STORAGE Setup
For RSDDC-Comp-Cluster, I choose to use VSAN cluster as storage. However as I said before, VSAN is not requirement for SDDC to work together. You can simply change it with any other storage.
VSAN setup
We are going to setup three VSAN Hosts to enable VSAN on RSDDC-Comp-Cluster. VSAN requires minimum three hosts to enable VSAN cluster services. In this Nested environment, I have three vESXi hosts running
- rsddc-cn1.rc.lab
- rsddc-cn2.rc.lab
- rsddc-cn3.rc.lab
Each of these hosts have following virtual disks assigned which provides SCSI devices to ESXi host
- 3 500 GB virtual disks for disk capacity
- 1 100G virtual disk for SSD
I preferred three disks for capacity because it can allow me to set VSAN IO polices upto three stripes per object. The three hosts can allow upto 2 failure to tolerate.
Steps Prior to Enable VSAN Cluster
Before you join hosts to VSAN cluster, you will need tag virtual disk as SSD device on vESXi host. This is almost faking ESXi host that it is writing to SSD device. This is ok for demo/lab purposes, do not tag it on production host as it can have side effects.
Flagging local disk as SSD
VSAN Cluster requires atleast one SSD device present on the host to join VSAN cluster. In Nested environment, this requirement could be challenging. However there is a way to flag a device as SSD.
NOTE: PLEASE DO NOT TAG SSD on live system. This could have side effects when you run workloads.
We will follow the steps described in VMware KB 2013188.
Step 1: Login into console of ESXi Host

Step 2:  Get  device info for SSD tagging
# esxcli storage nmp device listThe command output lists all the devices. And say, we need to tag mpx.vmhba1:C0:T1:L0, the following shows the information for the device. Note that “Device Display Name” shows as Local VMware Disk, this is expected under Nested Environment. Because the underlying disk is vmdk disk which is exposed as SCSI device to Nested ESXi.
mpx.vmhba1:C0:T1:L0
Device Display Name: Local VMware Disk (mpx.vmhba1:C0:T1:L0)
Storage Array Type: VMW_SATP_LOCAL
Storage Array Type Device Config: SATP VMW_SATP_LOCAL does not support device configuration.
Path Selection Policy: VMW_PSP_FIXED
Path Selection Policy Device Config: {preferred=vmhba1:C0:T1:L0;current=vmhba1:C0:T1:L0}
Path Selection Policy Device Custom Config:
Working Paths: vmhba1:C0:T1:L0
Is Local SAS Device: false
Is USB: false
Is Boot USB Device: false
Also note the SATP_TYPE from this output. For our cause SATP_TYPE is VMW_SATP_LOCAL (If you are using SAN device, then you might need to tag the device as SATP_LOCAL as well).
Step 3: Tag the device as SSD
#esxcli storage nmp satp rule  add –satp=SATP_LOCAL –device mpx.vmhba1:C0:T1:L0  –option “enable ssd”
Step 4:Unclaim/Reclaim device rules
Now unclaim the device and reclaim device to get new rule added with following commands
# esxcli storage core claimimg unclaim –type=device –device mpx.vmhba1:C0:T1:L0
# esxcli storage core claimrule load
# esxcli storage core claimrule run
# esxcli storage core claiming reclaim -d mpx.vmhba1:C0:T1:L0
Step 5: Verify that device is now presented as SSD
~ # esxcli storage core device list -d mpx.vmhba1:C0:T1:L0
mpx.vmhba1:C0:T1:L0
Display Name: Local VMware Disk (mpx.vmhba1:C0:T1:L0)
Has Settable Display Name: false
Size: 102400
Device Type: Direct-Access
Multipath Plugin: NMP
Devfs Path: /vmfs/devices/disks/mpx.vmhba1:C0:T1:L0
Vendor: VMware
Model: Virtual disk
Revision: 1.0
SCSI Level: 2
Is Pseudo: false
Status: on
Is RDM Capable: false
Is Local: true
Is Removable: false
Is SSD: true <---------------SSD flag
Tag all three virtual disks (one per host) as SSD device.
VSAN NETWORK SETUP
The networking setup for VSAN is little bit tricky in the nested lab environment. VSAN nodes require dedicated networking that has following requirement
- If VSAN nodes reside under same subnet, then the physical switch connected to them has to be IGMP capable
- If VSAN nodes cross subnet boundary, then multicast router is required.
In order to enable this under Nested environment, I have to put all VSAN nodes under same subnet and connect them to vSwitch on physical host. I have dedicated vSwitch (vSwitch-VSAN) with promiscuous mode turned on. Luckily, this enabled L2 Broadcast domain that is required for VSAN nodes to talk to each other.
On vESXi VM, I have three vmnics that are mapped to three networks
- Default vswitch
- VSAN network vSwitch
- Comp-DVswitch to be managed by NSX for workloads
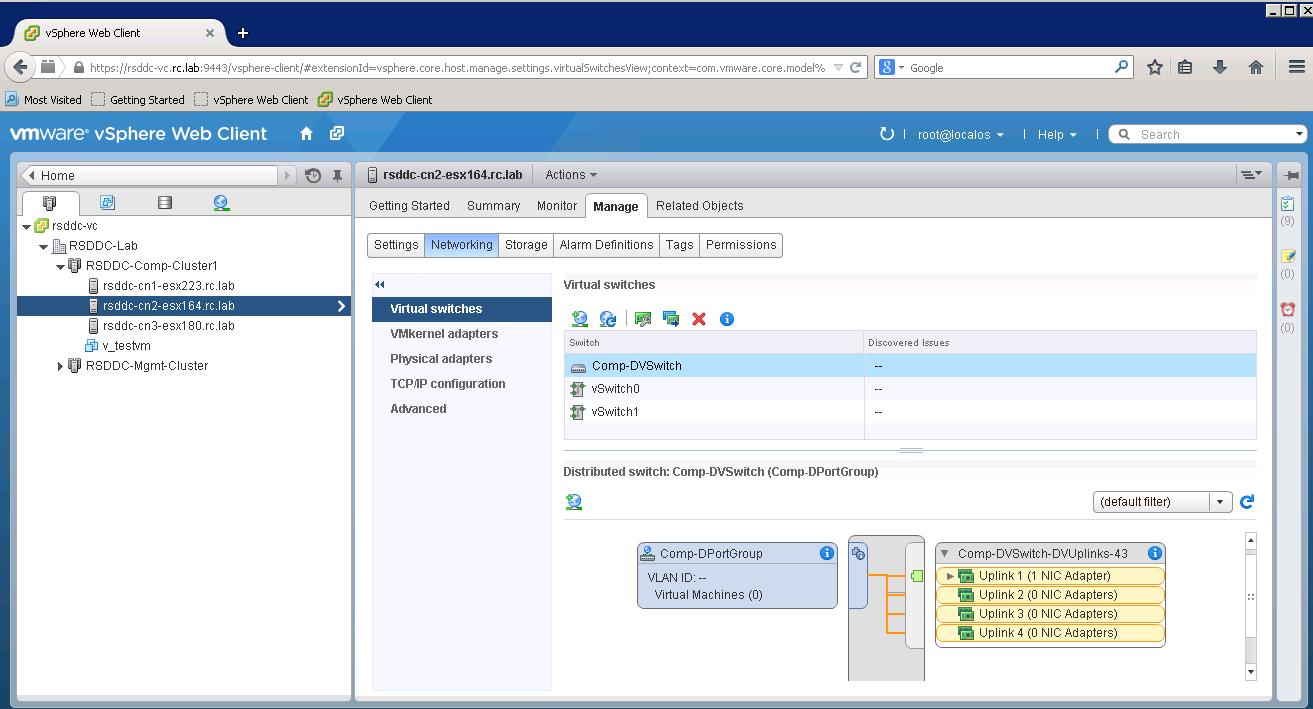
We need to setup DVSwitch to enable all vESXi to talk to each other and NSX to setup Logical networks over DVSwitch. Comp-DVSwitch will be managed by NSX. Later after NSX setup, I will show you how to connect this DVSwitch to be managed by NSX.
VSAN-vSwitch is used for VSAN cluster communication.
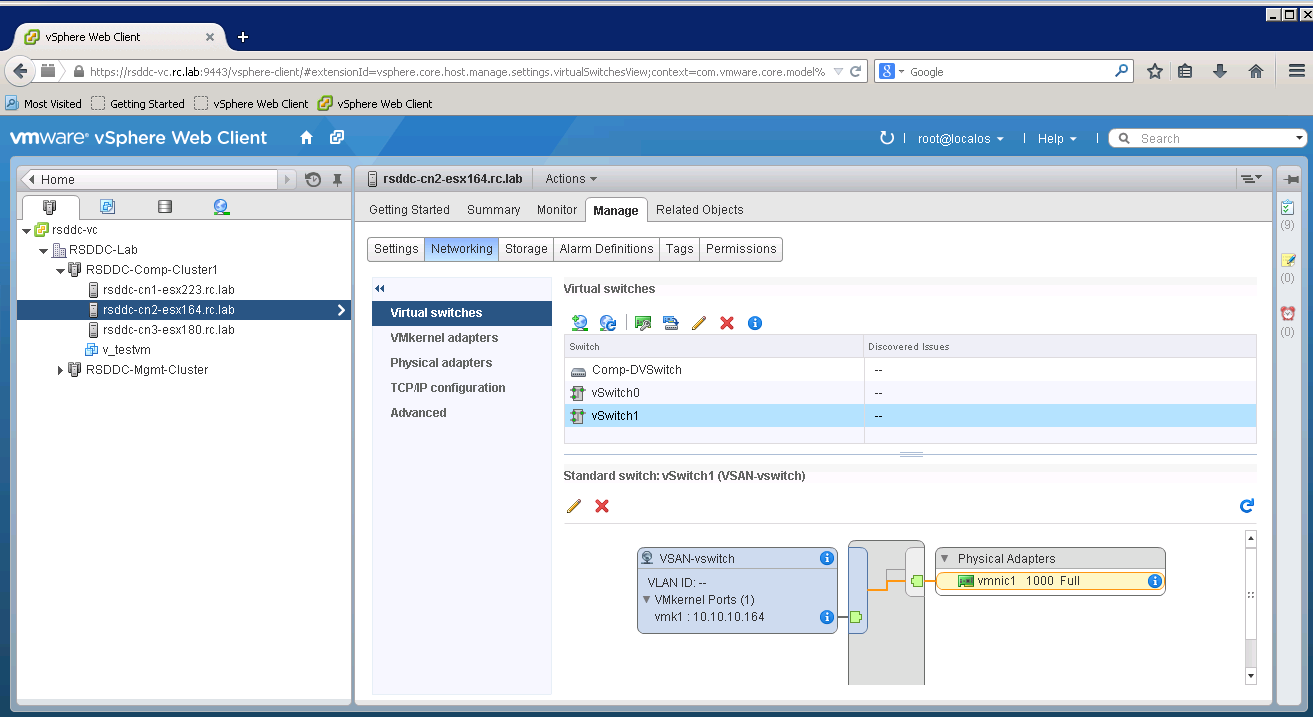
On Physical host, VSAN-vSwitch is setup as below

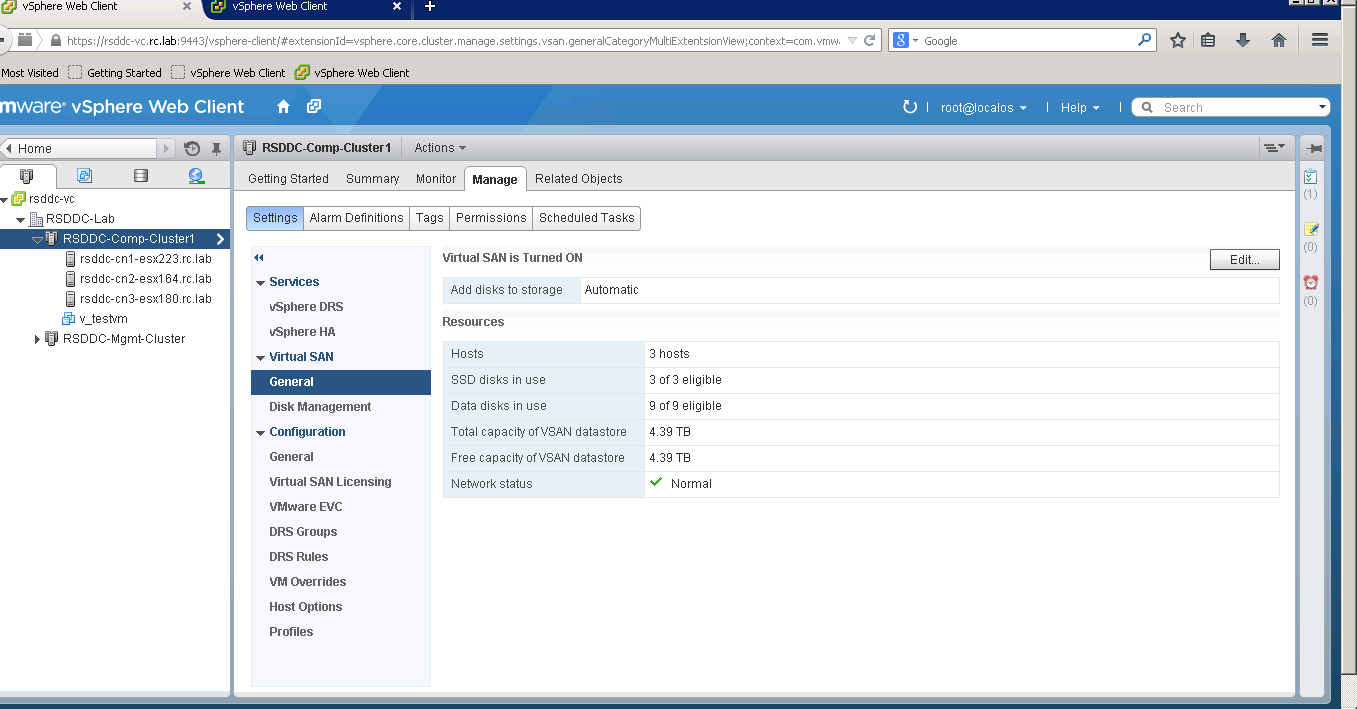
Enable VSAN Cluster
Now we are going to enable VSAN on RSDDC-CompCluster. After VSAN is turned on, VirtualCenter will perform following operations
– Create Disk groups and claim disks on VSAN nodes
– Enable VSAN cluster and let VSAN nodes join the cluster
– Pools all VSAN storage into one vsanDatastore
Under RSDDC-CompCluster-> Manage tab, select Settings, select Dropdwn Virtual SAN
New Cluster Dialog pops up and you can check “Turn On” on Virtual SAN.

There is one more option to select how you would like to add disks from new host added to Virtual SAN cluster. VSAN can automatically create all available disks into VSAN diskgroup and assign to VSAN cluster. If you prefer to manually select them, then select “Manual” on the pop-down menu. I suggest to choose Automatic and it is easier to let VSAN automatically fetch all disks and create disk groups. You also have option to add/remove disks from disk group.
After this operation, VSAN is ready to use. You will see storage is pooled and total storage capacity is shown.